Preparing your own packaged dry meals is a great way to get the most out of your garden and save a few bucks in the process.
Making your DIY survival food is a good alternative, especially if you properly use seasonal vegetables, the backyard garden, and grocery store sales.
Dried vs. Freeze Dried
Freeze-drying works by sublimation by converting the water inside the food from solid ice directly to gas. Simply, the process removes moisture from the food without changing its chemical composition of the food.
When the moisture is removed, the food lasts longer without compromising the taste. Since it is carried out under a vacuum, it lowers the boiling point of water.
Also, there’s no need for heat in the freeze-drying process. That means freeze-dried food holds more nutrition and flavor when compared to traditional dried.
It is costly unless you intend to stock serious amounts of freeze-dried foods. Over the long haul, It would be more economical to buy a freeze dryer for yourself.
I use Ready Wise for all my food storage for good reasons. They have a better-tasting product than anyone else out there. The food is GMO-Free and Certified Organic, and if you use the Rakuten Chrome extension, they will offer a 6% discount.
Traditional drying is time-consuming and depends on whether your dehydrator speeds things along with a heating element.
It can affect the flavor and texture of food. Most foods taste best when dried at a relatively low temperature, say between 90F and 110F, until they’re dry enough to snap in two rather than bend.
Save Money and Make Your DIY Survival Food
To make drying your food an option, it must be economical. Fortunately, the supplies you’ll need should be affordable and long-lasting.
A basic setup can be as straightforward as a piece of screen mounted on a wooden frame. The food you’re drying should be sliced thin and left in the sun.
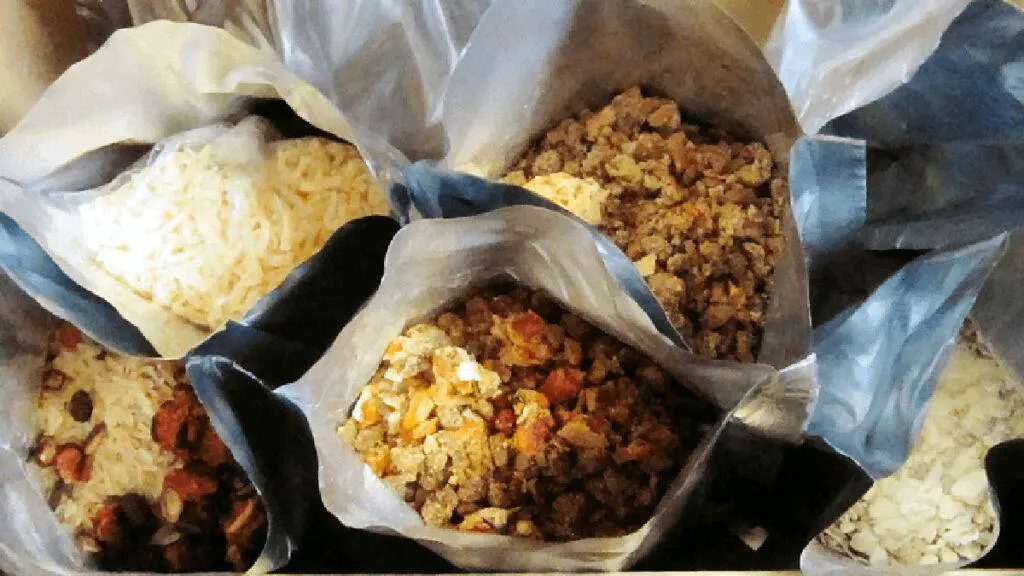
Then it can be packed into freezer bags along with some dry rice to act as a moisture absorber. Now you can keep it on the shelves for months.
There are a few things that you can do to extend the shelf life of your dried foods. One of the most important is tight sealing. For this, Mylar bags work best to restrict moisture, air, and light.
Getting The Right Gear
An advanced approach can extend the shelf life of your meals, help them taste better, and preserve the nutrient contents of your fruits, vegetables, and meat. To get the best results, you need to have the right equipment.
Dehydrator. People need at least four trays to make the most of each drying session. Look for a dehydrator with adjustable heat levels and a circulation fan. Preferably, Nesco makes a tremendous entry-level dehydrator.
Mylar Bags. Mylar bags are the best way to seal up your instant meals. You can buy the material in bulk for an affordable price online and reuse them. However, you need to use it with a quality vacuum sealer, or it may not work effectively.
Vacuum Sealer. Seal-A-Meal is a low-cost vacuum sealer that works perfectly with quart-sized Mylar bags. It’s reliable, uses a one-touch operation that’s completely foolproof, and works well with Mylars. While buying a vacuum sealer, ensure it’s free of faults or production errors.
Desiccant. A desiccant can make your dried meals long-lasting. Silica gel is non-toxic, although the best option is an oxygen absorber that does double duty by keeping your food fresh and dry. The Mylar bags we recommended above come with a free package of these oxygen absorbers.
What Can I Dry?
In short, you can dry almost everything. Besides, some techniques make a surprising number of foods possible to dry. In general, try to cut your food into thin, uniform slices, and don’t pile them up on the tray.
Foods like potato, beet, and carrot dry just after they’ve been cooked as they do raw. Drying cooked food is one of the secrets to making instant meals.
Refried beans, hummus, greek yogurt, mashed potatoes, and other thick, pasty foods can be dried in the same way as making fruit leather. Spread out squares of parchment paper on the dehydrator trays and put a dollop in the center of each.
Spread them out using the back of a spoon. A low oven would work for large batches, although a dehydrator works much faster.
Some foods, like tomatoes, carrots, celery, and bell peppers, can be powdered after dehydration. Dried powdered vegetables make excellent soup and sauce bases and add a lot of flavor to a recipe.
You can see that with some creativity, it’s possible to do more than just make apple and banana chips.
Although more people are familiar with canning, drying your fruits and vegetables can be an excellent way to preserve your harvest and turn bushels of fresh produce into hundreds of convenient fast meals.
A Few Great Meal Ideas
All of these meals rehydrate in minutes with boiling water. All you need to do is empty the pre-measured mylar pouches into your canteen cup of boiling water, stir, and wait for your food to rehydrate.
Instant Tomato Soup You can use powdered tomato to make a delicious soup base. Optional ingredients like bell pepper, spices, and powdered milk can be added to the mix. Also, tomato soup increases appetite and promotes a healthy metabolism cycle. Instant tomato soup is a great campfire lunch for people with kids.
Thai Noodles If you grow hot peppers in your garden, try making Thai-inspired instant noodles. Small pieces of dehydrated pepper, with a beef bouillon cube, brown sugar, and beef jerky with rice noodles. Since the rice noodles are so thin, they don’t need to be boiled in the water and will rehydrate in just a few minutes. You can build a lot of different ramen-style dishes using rice noodles and dried vegetables.
Beef StroganoffIf you decide to try drying Greek yogurt, or pick up a little buttermilk powder online, then beef stroganoff is the best. Boil water in your canteen cup with a handful of egg noodles. Add beef-jerky pieces, yogurt or buttermilk powder, and dehydrated garlic and onion powder. Get The Recipe Here
Vegetable Rice Instant rice makes this delicious side dish incredibly easy. Dried fresh peas, green bean pieces, cooked carrot slices, and anything available can be added to instant boiling rice made slightly wet. In minutes you’ll have the perfect accompaniment to freshly caught fish.
Beef Stew Try this version of instant beef stew, and you might never go back to canned. Slices of cooked and dried carrot and potato with beef jerky, onion, garlic powder, spices, and beef bouillon, make an excellent instant campfire stew. This is another great recipe that’s easy to customize with whatever you have on hand, from dried peas and bell peppers to mushrooms and tomatoes.
Must-Have Meals-Ready-to-Eat (MREs)
Besides preparing your homemade survival food, you need to have some meals that are ready to eat instantly. Other than calories, each MRE should have carbohydrates, protein, and fruits/vegetables. Here, fats are good for gaining energy and also because they absorb fat-soluble vitamins like vitamins A, D, E, and K.
Simply putting, carbs=energy that you can get from fast-cooking noodles (soup noodles, ramen, or rice noodles), oats, and mashed potato flakes. Next, protein gives you the strength to do your everyday work on survival days. Some protein-rich dishes are freeze-dried meats, jerky, dried bean paste, and lentils.
Finally, fruits and veggies give us fiber, vitamins, and minerals. Some examples are freeze-dried tomatoes, onions, peppers, spinach, kale, bananas, apples, etc.
You should aim for variety when it comes to fruits and vegetables. Bright-colored vegetables like tomatoes are rich in antioxidants that boost your immunity, crucial in survival situations. Darky leafy veggies are rich in calcium and iron.
Some examples demonstrating MRE combinations:
Breakfast
dried apples and bananas
oats
sugar
cinnamon
powdered milk
Chicken soup
dried tomatoes, carrots, and peppers (blended to powder)
herbs and spices
dried milk
freeze-dried chicken bits
salt, pepper
soup noodles
Is It Worth the Work?
Considering that companies like Wise Foods and Legacy can offer high-quality, affordable meals with a long shelf life. DIY dried foods might not be for everyone.
If you’re a gardener, or you already happen to own your dehydrator, then making your instant meals can be a money-saving measure. Besides, if you happen to learn to make dehydrators, god knows it might help you in doomsday.
On the other hand, if you aren’t willing to put in the time, effort, and initial investment to get up early and running. Then the best option is to buy an off-the-shelf meal.
Pre-packaged freeze-dried foods have a longer shelf life, sometimes lasting years longer than a DIY meal. They also come with all the research, development, and testing that renowned brands do to ensure their meals rehydrate and taste great.
Whether you’re making your own or picking a pouch from a major manufacturer, it’s hard to beat the convenience and flavor of instant food. Instead of carrying heavy cooking gear and a cooler full of ingredients, try adding a few instant meals to your pack.
With some creativity, affordable appliances, and continuous trial and error, you’ll hopefully make your long-lasting instant food straight from your backyard garden.